
by Kathy Douglas | Apr 18, 2017 | Desserts
Perfect for spring or summer parties, these quick and easy tartlets make a tasty treat for any social occasion. The recipe comes together is a short time and can be refrigerated until ready to serve. You can make your lemon curd or use a high-quality jarred version such as Williams-Sonoma, Stonewall Kitchens, or Wilkin and Sons.
INGREDIENTS
30 frozen filo tartlet shells
½ stick butter
1 cup sugar
One large egg and one large egg yolk
1 ½ tablespoons flour
½ cup buttermilk
½ teaspoon vanilla
Pinch cinnamon
5 tablespoons lemon curd, high quality jarred or homemade
15 raspberries, sliced in half
30 baby mint sprigs, optional
INSTRUCTIONS
Preheat the oven to 350 degrees. Set the frozen filo shells on a cookie sheet. Add the butter and sugar to a large bowl. Using a hand mixer, combine them until light and fluffy. Incorporate the eggs and mix in well. Add the flour and mix until combined. Add the buttermilk, vanilla, and cinnamon, mixing again until well combined. Carefully spoon into the filo cups. Bake for 15 minutes and then cool completely.
When cooled, add ½ teaspoon of lemon curd to each cup. Top with ½ of a raspberry and mint sprig, if using. Keep chilled until ready to serve.
by Kathy Douglas | Mar 20, 2017 | Desserts
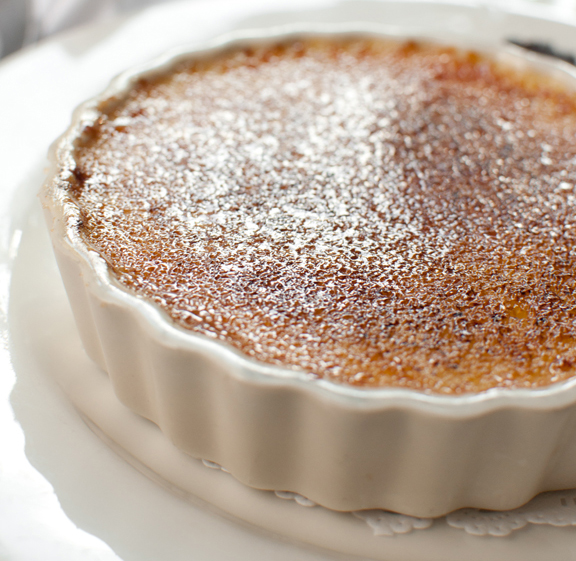
Making crème brûlée is very easy. It starts with simple custard-filled ramekins baked in a water bath. You can make it ahead for your next party, then add the sweet crackly vanilla sugar top right before serving. You don’t need a kitchen torch to brûlée the top. However, we must admit, we love our kitchen torch. You can use the broiler setting in your oven; be sure to watch carefully, so your sugar doesn’t burn. You can make your vanilla sugar by adding a whole vanilla bean to 2 cups of white sugar. Store in a jar for three days, shaking daily. The longer you store the bean in the jar, the stronger the vanilla flavor.
INGREDIENTS
1 ¼ cups heavy cream
½ cup whole milk
2 ounces chopped dark chocolate
3 large egg yolks
1/3 cup vanilla sugar
1 ½ tablespoons Rivulet Pecan Liquor
Extra vanilla sugar for the topping
INSTRUCTIONS
Preheat the oven to 325F. Place six ramekins or Crème Brûlée Dishes on a baking sheet. Heat an electric or stovetop kettle full of water to hot.
Add the cream and milk to a large saucepan, bring to just to a boil. Remove from the heat and add the chopped chocolate; stir to melt completely.
In a medium bowl, whisk the egg yolks, vanilla sugar, and Rivulet Pecan Liquor together until well blended. While you continue to whisk, slowly drizzle in about ½ cup of the hot chocolate milk and cream mixture; whisk until well combined. Continuing to whisk, slowly pour in the remainder of the chocolate milk and cream mixture and whisk until thoroughly combined.
Pour the mixture evenly into the 6 ramekins. Place the ramekins into a large cake pan or roasting pan. Carefully pour enough hot water into the pan to come halfway up the sides of the ramekins. Bake just until the crème brûlée is just set, but still a little movement in the center, approximately 40 to 45 minutes. Cool completely.
Tightly cover each baked custard with plastic wrap and refrigerate for at least 3 hours, overnight is preferred and for up to two days. Note: Chill the custards thoroughly for the sugar to be successfully caramelized.
Sprinkle the top of each custard evenly with 1 tablespoon of vanilla sugar. Brown the caramel using a kitchen torch or the broiler in the oven. If broiling, watch carefully, so the topping doesn’t burn. Serve immediately.
by Kathy Douglas | Feb 6, 2017 | Desserts
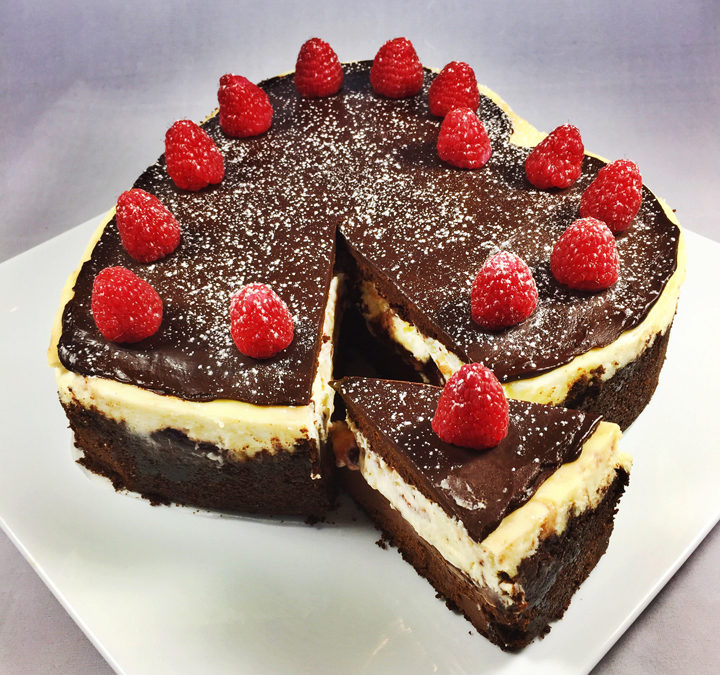
Valentines speak of love but nothing says love like our chocolate and raspberry Valentine Cheesecake. So give your sweetheart the gift of delicious with our easy to make and tasty to eat holiday treat. Chocolate crumb crust and chocolate cheesecake bottom are topped with vanilla and raspberry swirled cheesecake and then finished with chocolate ganache, a sprinkle of powdered sugar, and fresh raspberries.
Cheesecake
3 cups chocolate graham cracker or chocolate cookie crumbs
4 tablespoons butter, melted plus 1 tablespoon softened for the pan
10 ounces semisweet chocolate, chopped
4 8-ounces packages cream cheese, room temperature and softened
1-1/4 cups sugar
1 cup sour cream, room temperature
1 teaspoon vanilla extract
3 large eggs, room temperature
1 8-ounce jar seedless raspberry jam
2 tablespoons Chambord (Black Raspberry Liquor)
Ganache Topping
12 ounces chocolate
½ cup cream
Fresh raspberries, rinsed and dry
Powdered sugar
Preheat the oven to 350 degrees. Prepare a heart shaped or 9-inch springform pan by greasing the sides of the pan with softened butter. Line the bottom with parchment paper, and grease the parchment. Combine the graham cracker crumbs with the melted butter and using a flat-bottomed cup, press into the pan and up the sides. Bake for 15 minutes, remove from the oven and cool completely. Securely wrap 3 sheets of foil around and up the outsides of the springform pan to make it waterproof. Reduce the oven to 325 degrees.
Using a microwave or a large bowl set over simmering water, melt the chocolate. Remove the chocolate from the heat and set aside to cool.
Using a stand mixer beat the cream cheese and sugar until just smooth. Beat in sour cream and vanilla. Add the eggs one at a time, beating on low speed until just until combined. Remove half the batter and add it to the melted chocolate; stirring until well combined. Pour over the chocolate crust and smooth the top.
In a small bowl, combine the raspberry jelly and the Chambord mixing well. Add half of the remaining cheesecake batter in three dollops over the chocolate. Add the raspberry jelly mixture over the chocolate and the batter. Add the remaining batter over top and smooth the surface.
Place the springform pan in a large roasting pan and add enough boiling water to come halfway up the sides of the springform pan. Carefully place in the center of the oven and bake the cheesecake for 1 hour 15 minutes until center is just set and top appears dull. Turn the oven off, open the door for 5 minutes, then shut the oven door and leave the cheesecake in the oven, with the oven off, for another hour. Remove the cheesecake from the oven and the springform pan from water bath; remove foil. Cool cheesecake on a wire rack for 2 hours. Refrigerate overnight to chill completely. Carefully run a hot knife around edge of the pan between the cheesecake and the pan to loosen it; remove the spring form.
For the topping, place chocolate in a small bowl. Heat the cream until simmering and pour over the chocolate; whisking until smooth. Cool slightly and spread over top of cheesecake. Refrigerate until set, about 15-20 minutes. Top with raspberries, powdered sugar and serve.
Makes 14-16 servings.
by Kathy Douglas | Dec 19, 2016 | Desserts
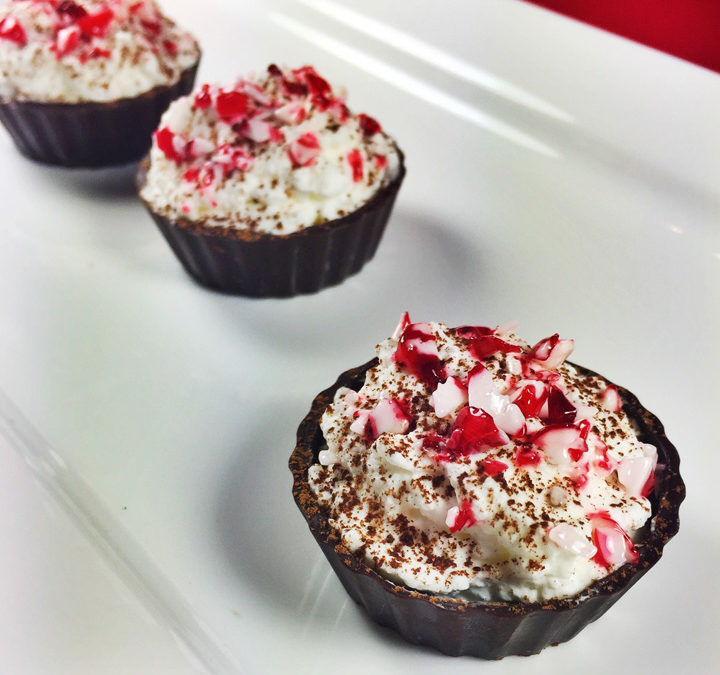
Holiday candy meets easy dessert in a two-bite treat! Our Peppermint Bark Mousse Cups are the tasty combination of cool peppermint and white chocolate mousse inside a dark chocolate dessert cup. Peppermint Bark Lovers will rejoice with this luscious sensation of a favorite holiday delicacy. Perfect for holiday parties and celebrations, and very simple to create, our two-bite dessert is sure to be a crowd pleaser for everyone. ChocoMaker Dark Chocolate Dessert Cups are available at Walmart Grocery.
INGREDIENTS
½ cup heavy cream
1 egg white
4 ounces white chocolate melted
24 ChocoMaker Dark Chocolate Dessert Cups or any store bought mini dark chocolate cups
2 tablespoons crushed peppermint
1 teaspoon cocoa powder for dusting
INSTRUCTIONS
Whip the cream until it holds soft peaks. Beat the egg white until it holds soft peaks. Fold the white chocolate into the beaten egg white, then into the whipped cream. Spoon into the chocolate cups and refrigerate until the mousse sets – at least 1 hour. Dust with the cocoa powder and garnish with crushed peppermint.
by Kathy Douglas | Dec 5, 2016 | Desserts
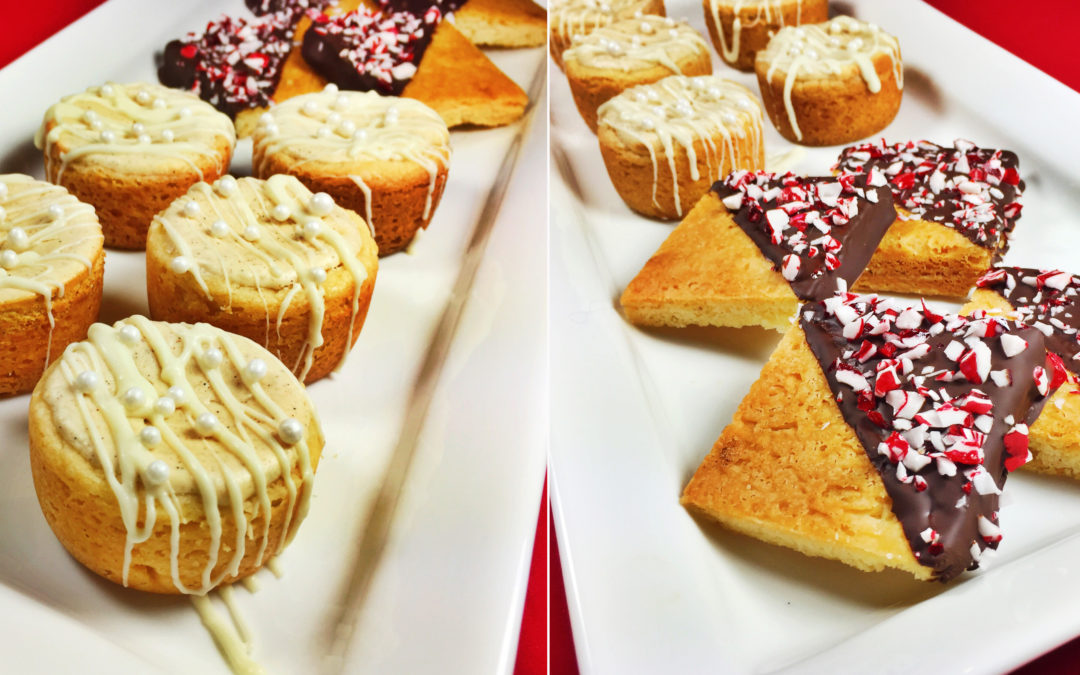
Shortbread dough is so flexible and perfect when you want to make an assortment of holiday baked goods using only one batch of dough. With this recipe, you can also customize your treats to suit your taste. We used holiday cookie decorations, but finely chopped nuts will be perfect as well. Get creative with cookie decorations such as colored sugar, jimmies, sprinkles, luminous candy pearls or sparkling dragees. Butter is such a critical ingredient in these treats, so we recommend using a top-quality butter, such as Cabot, Plugra or Kerrygold.
Shortbread Dough
INGREDIENTS
1 cup (2 sticks) unsalted butter at room temperature, use high quality such as Cabot, Plugra or Kerrygold
1 cup confectioners sugar
2 teaspoons vanilla extract
½ teaspoon almond extract
2 cups flour
INSTRUCTIONS
In an electric mixer bowl fitted with a paddle attachment, beat together the butter, sugar, vanilla, and almond extract until fluffy, then beat in the flour ½ cup at a time. The dough may seem a little dry but keep beating till it comes together. If it won’t come together, drizzle in 1 teaspoon of water at a time up to 3 teaspoons until it does. You are creating a stiff dough, so only add as much water as necessary.
Divide the dough in half, wrap tightly in plastic wrap and refrigerate until use.
Chocolate Candy Cane Shortbread Cookies
INGREDIENTS
½ batch shortbread dough
1 cup chocolate chips
1/8 teaspoon peppermint extract
½ cup crushed candy canes
INSTRUCTIONS
Preheat the oven to 350 degrees. Using butter, lightly grease one square 9″ cake pan. Place parchment in the bottom and lightly grease the parchment.
Press the dough into a prepared pan, smoothing the surface with you fingers. Chill the dough in the pan for 30 minutes.
Use a fork to prick the dough all over in an even pattern; this allows any steam to escape. Bake the shortbread until it’s a light golden brown across the top surface, and a deeper golden brown around the edges, about 25 minutes.
Remove the pan from the oven. Handling the baked dough carefully, immediately turn the shortbread out onto a cutting board. Using a sharp knife, cut into 16 squares. Be sure to do this while the shortbread is still warm; it won’t cut easily if it cools. Transfer the shortbread squares to a rack to cool.
Melt the chocolate chips in the microwave at 50% power in 45-second intervals, stirring in between each interval, until melted completed. Spread the chocolate in a pattern on half of each cookie then set on parchment to cool. Sprinkle with crushed candy cane, or any decorations you choose, and refrigerate until the chocolate sets. Makes 16 cookies.
Mini Holiday Cinnamon Cheesecakes
INGREDIENTS
1/2 batch shortbread dough
One 8-ounce package cream cheese at room temperature
¼ cup sugar
2 tablespoons heavy cream
1 large egg
½ teaspoon cinnamon
1 teaspoon vanilla bean paste or vanilla extract
¼ cup white chocolate chips
holiday sprinkles or dragees
INSTRUCTIONS
Preheat the oven to 350 degrees. Using butter, lightly grease a 12-cup mini cheesecake pan or muffin pan. Divide the dough into 12 pieces and place in the pan’s cups. Press firmly to the bottoms and up the sides. Use a fork to prick the dough all over; this allows any steam to escape. Bake in the preheated oven for 15 minutes, until set and just beginning to brown. Remove from the oven and let cool completely.
To make the cheesecake batter, in an electric mixer bowl fitted with a paddle attachment, beat the cream cheese and sugar until smooth. Add the cream, egg, cinnamon and vanilla; mixing well. Spoon the batter into the cooled crusts, using between one to two tablespoons in each.
Bake the cheesecakes for 25 minutes. Remove from the oven and let cool for 20-30 minutes. Use a knife to gently loosen the edges, then carefully remove the cheesecakes from the pan. Chill for 30 minutes. Place the cheesecakes on a parchment lined sheet pan.
Melt the white chocolate chips in the microwave at 50% power in 45-second intervals, stirring in between each interval, until melted completed. Using a fork, drizzle the white chocolate over the top of the cheesecakes and immediately add holiday sprinkles, candy pearls or dragees. Chill until the chocolate is set and keep cool until ready to serve. Makes 12 mini cheesecakes.
by Kathy Douglas | Dec 5, 2016 | Desserts
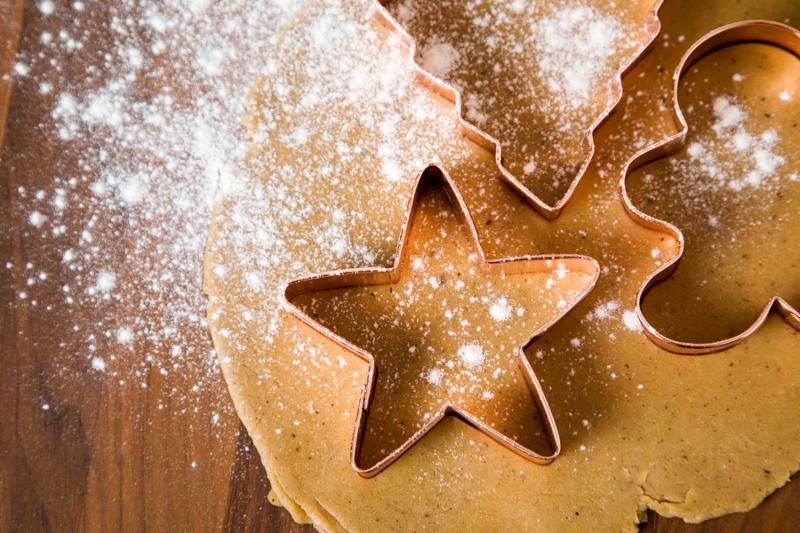
Here are our top 5 baking tips for Holiday Cookies –
- READ THROUGH ALL YOUR RECIPES
Read through all the recipes at once to understand how each recipe will work and map out a plan. Start ahead, and pace yourself, to match the recipes and to bake efficiently. One idea: You can make all your dough at once, cut out and bake another day, and then decorate on a different day. Try our ideas below by using your freezer and refrigerator.
- CHECK ALL YOUR INGREDIENTS FOR FRESHNESS
Freshness counts – it makes a huge difference between successful and unsuccessful baking. Buy fresh ingredients and check the rest of your ingredients for expiration dates. Nuts, seeds, and high-protein flours turn rancid quickly. Test nuts and seeds by smell or tasting them prior to use. Spoiled flour will have a rancid smell. Lastly, be sure to check the expirations dates on your baking soda and baking powder to make sure they are not past their prime.
- UNDERSTAND TEMPERATURE
Temperature plays a variety of roles when baking. Butter won’t cream correctly if it’s too cold or too warm. Your oven’s temperature needs to be accurate. Some recipes call for chilling the dough prior to cutting, rolling, or baking.
The proper creaming of the butter and sugar is critical to the finished texture of your cookies. Make sure you start far enough ahead to have all your ingredients at the proper temperature. If you haven’t checked your oven in a while, invest in an oven thermometer. Make sure your oven is heating to the proper temperature so you don’t over or under bake your cookies. If it’s required by your recipes, always allow plenty of time for your dough to chill properly. Some dough can be left refrigerated for up to a week prior to baking!
- FREEZE THE DOUGH
Make your dough ahead of time and freeze it. Slice and bake cookies can be frozen as a log, then bring the dough back to refrigerator temperature before slicing. Drop cookies can be scooped into balls and frozen on sheet trays. Once frozen, simply transfer to a freezer bag for storage. Cut-out cookie dough can be shaped into disks, then wrapped in plastic and frozen. When it’s time to bake, bring the dough back to refrigerator temperature before rolling and cutting.
- BAKE AND FREEZE THE COOKIES PRIOR TO DECORATING
No time to decorate? Freeze your baked cookies, then thaw and decorate right before serving or giving as gifts. Store them in an airtight container in your freezer to help prevent breaking and separate the cookies with parchment paper to prevent them from sticking.

Recent Comments